

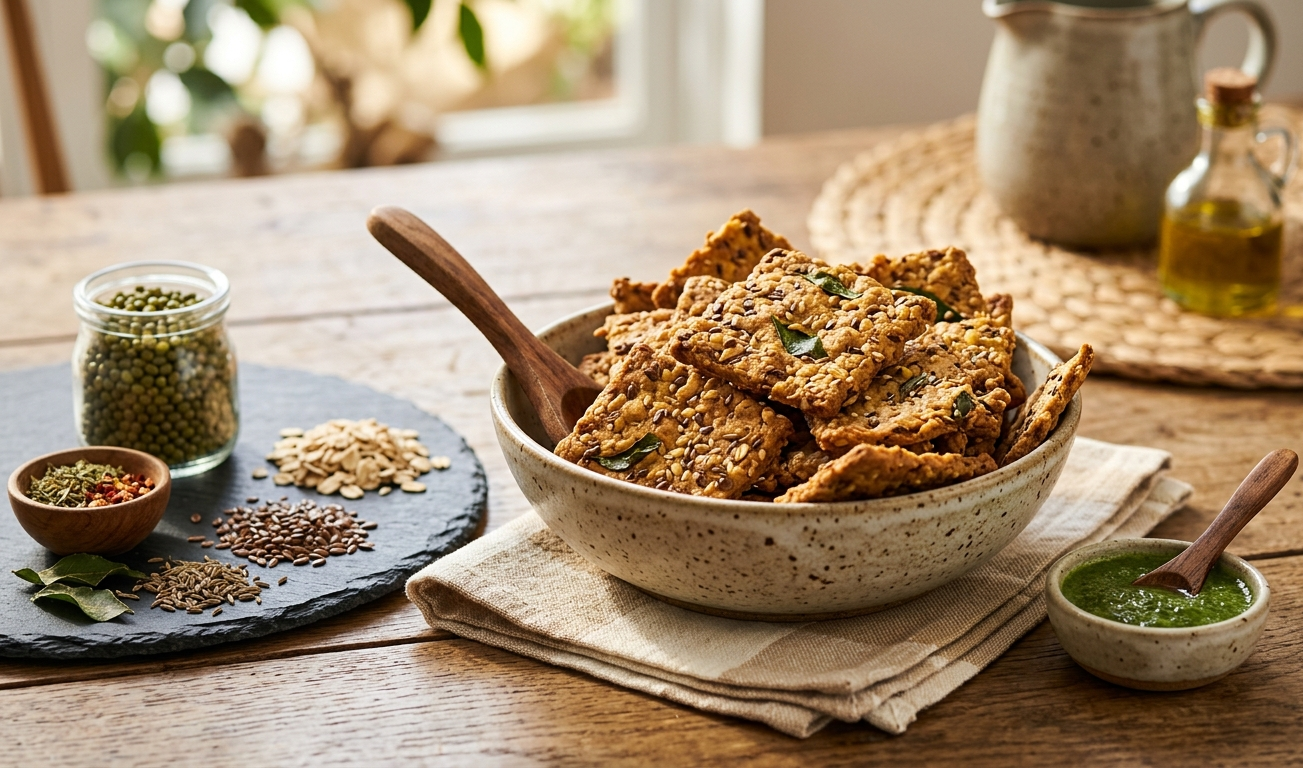
Craving something crunchy without the guilt? These easy-to-make snacks bring together wholesome ingredients and delicious flavours, all with little or no frying.
1. Air-fried or Baked Falafel Bites

Crispy on the outside and flavourful inside, these falafel bites are a lighter take on the classic favourite.
Prep time: 20 mins (plus overnight soak + 30 min chill) | Cook time: 15–30 mins
Ingredients
- 250g dried chickpeas, soaked overnight
- 1 pieces small onion, roughly chopped
- 4 pieces garlic cloves
- 0.5 cups fresh parsley leaves
- 0.5 cups fresh cilantro leaves
- 1.5 tsp ground cumin
- 1 tsp ground coriander
- 0.5 tsp ground black pepper
- 0.3 tsp cayenne pepper
- 1 tsp salt
- 1 tsp baking powder
- 2 tbsp chickpea flour
- 2 tbsp olive oil (for brushing)
Method
- Soak chickpeas: Place dried chickpeas, soaked overnight in a large bowl and cover with cold water by at least 3 inches. Soak overnight (8–12 hours). Drain and pat dry. Do not use canned chickpeas — they’ll make the mixture too wet.
- Blend the mixture: Add drained chickpeas, onion, roughly chopped, garlic cloves, fresh parsley leaves, fresh cilantro leaves, ground cumin, ground coriander, ground black pepper, cayenne pepper, and salt to a food processor. Pulse until the mixture resembles coarse, slightly crumbly sand — not a smooth paste. Don’t over-blend.
- Add binder and chill: Add baking powder and all-purpose flour (or chickpea flour) to the mixture and pulse a few more times to combine. Transfer to a bowl, cover, and refrigerate to firm up.
- Preheat and prep: For air fryer: preheat to 375°F (190°C). For oven: preheat to 400°F (200°C) and line a baking sheet with parchment paper. Scoop the chilled mixture and roll into small balls or patties, about 1.5 inches wide.
- Oil and cook: Brush or lightly spray each falafel bite with olive oil. Air fryer: cook in a single layer for 15–18 minutes, flipping halfway, until deep golden brown. Oven: bake for 25–30 minutes, flipping once halfway through.
- Serve: Let cool for 2–3 minutes. Serve with warm pita, hummus, tahini sauce, cucumber, and tomatoes.
2. Creamy Air Fried Egg Bites

Soft, creamy and protein-packed, these egg bites make a quick and satisfying snack.
Prep time: 10 mins | Cook time: 25–30 mins
Ingredients
- 6 pieces large eggs
- 0.5 cups cottage cheese (full fat)
- 0.5 cups shredded Gruyère cheese
- 0.5 tsp salt
- 0.3 tsp black pepper
- 4 pieces cooked bacon strips, crumbled
- 0.3 cups roasted red peppers, diced
- 2 tbsp fresh green onion, chopped
- 1 tbsp butter (for greasing)
Method
- Blend the egg base: Add large eggs, cottage cheese (full fat), shredded Gruyère or cheddar cheese, salt, and black pepper to a blender. Blend on high for 30 seconds until completely smooth and frothy. This step is key for that creamy, custardy texture.
- Add fillings: Divide cooked bacon strips, crumbled, roasted red peppers, diced, and fresh chives or green onion, chopped evenly among the greased muffin cups.
- Preheat your air fryer to 300°F for 3 minutes.
- Grease your silicone mold well, add fillings, then pour the blended egg mixture in — same as before.
- Place the mold in the air fryer basket. If your mold is wobbly, set it on a small trivet or the air fryer rack to keep it level.
- Air fry for 12–15 minutes until centers are just set with a slight jiggle. Check at 12 minutes — air fryers vary.
- Cool for 3–4 minutes before popping them out.
3. Multigrain or Moong Dal Munchies

Made with moong dal and wholesome grains, these crunchy munchies are perfect for tea-time snacking.
Prep time: 15 mins (+ 2–3 hrs soaking) | Cook time: 20–25 mins
Ingredients
- 150 gms moong dal (yellow split lentils), soaked 2–3 hrs
- 0.5 cups whole wheat flour (atta)
- 0.3 cups besan (chickpea flour)
- 0.3 cups oats (rolled or quick)
- 2 tbsp rice flour
- 2 pieces green chilli, finely chopped
- 1 tsp fresh ginger, grated
- 1 tsp cumin seeds (jeera)
- 0.5 tsp carom seeds (ajwain)
- 0.3 tsp turmeric powder
- 0.5 tsp red chilli powder
- 0.5 tsp chaat masala
- 0.8 tsp salt
- 2 tbsp fresh coriander (cilantro), chopped
- 1 tbsp sesame seeds (til)
- 2 tbsp oil
Method
- Soak the moong dal: Rinse moong dal well and soak in plenty of water for 2–3 hours. Drain completely and pat dry with a kitchen towel. The drier the dal, the crunchier the munchies.
- Coarsely grind dal: Add the drained moong dal to a blender or food processor. Pulse 4–5 times to get a coarse, slightly grainy paste — do not blend smooth. Transfer to a large mixing bowl.
- Mix the dough: To the ground dal, add whole wheat flour, besan, oats, rice flour, green chilli, finely chopped, fresh ginger, grated, jeera, ajwain, turmeric powder, red chilli powder, chaat masala, salt, fresh coriander, chopped, sesame seeds, and oil. Mix everything together into a stiff, firm dough. Add 1–2 tbsp of water only if needed — the dough should not be sticky.
- Shape the munchies: Preheat air fryer to 180°C (355°F) or oven to 190°C (375°F). Pinch small portions of dough and roll into marble-sized balls or flatten into small discs. You can also press through a murukku press or sev maker with a star disc for a traditional shape.
- Air fry or bake: Air fryer: Place in a single layer and air fry at 180°C for 18–21 minutes, shaking the basket halfway, until golden and crisp. Oven: Arrange on a parchment-lined baking tray and bake at 190°C for 22–25 minutes, flipping once halfway through.
- Cool and crisp up: Remove and spread on a wire rack or plate. They will crisp up further as they cool — resist eating them straight away! Wait at least 10 minutes before storing.
- Serve: Serve as a tea-time snack with green chutney or tamarind chutney, or enjoy plain as a crunchy munchie anytime.
4. No-fry Poha Chivda

Prep time: 10 mins | Cook time: 20–25 mins
Ingredients
- 3 cups thin poha (flattened rice, thin variety)
- 0.5 cups peanuts
- 0.3 cups roasted chana dal (dalia)
- 0.3 cups cashews
- 15 pieces curry leaves
- 3 pieces green chillies, slit
- 1 tsp mustard seeds
- 0.5 tsp cumin seeds
- 0.5 tsp turmeric powder
- 0.5 tsp red chilli powder
- 1 tsp sugar
- 1 tsp salt
- 3 tbsp oil
- 2 tbsp raisins (optional)
- 2 tbsp desiccated coconut (optional)
Method
- Roast the poha: Preheat oven to 160°C (320°F). Spread thin poha in a single even layer on a large baking tray. Bake for 12–14 minutes, stirring once halfway, until the poha is completely crisp and light. It should snap when pinched — no chewiness. Set aside to cool.
- Roast the nuts: On a separate tray (or the same tray after removing poha), spread peanuts and cashews. Roast at 160°C for 8–10 minutes until golden. Add roasted chana dal in the last 3 minutes. Watch carefully — nuts can burn quickly. Set aside.
- Prepare the tempering: Heat oil in a large kadai or wok on medium heat. Add mustard seeds and let them splutter. Add cumin seeds, curry leaves, and green chillies, slit — fry for 1 minute until the curry leaves turn crisp. Add raisins (optional) and dried coconut slices or desiccated coconut (optional) if using, and fry for another 30 seconds.
- Add spices: Lower the heat. Add turmeric powder, red chilli powder, sugar, and salt to the tempering. Stir quickly for 10 seconds — do not let the spices burn.
- Toss everything together: Remove the kadai from heat. Add the roasted poha and all the roasted nuts and chana dal. Toss gently but thoroughly until every piece of poha is coated in the turmeric-spiced tempering. Be gentle — the poha is delicate.
- Cool and store: Spread the chivda out on a large tray and allow to cool completely — at least 15 minutes — before storing. It will crisp up further as it cools. Store in an airtight container.
Really loved it